Help & Training Center
Operational User Manual for Your Role (CLIENT)
Filtered to display topics relevant specifically to your logged-in role (CLIENT).
🎯 Role-Filtered View Active: Showing manual topics for CLIENT. Click "Show All Role Manuals" to browse manuals for other roles.
🔍
Popular Quick Searches:
Intake Registration
1How to Submit a New Requirement Intake
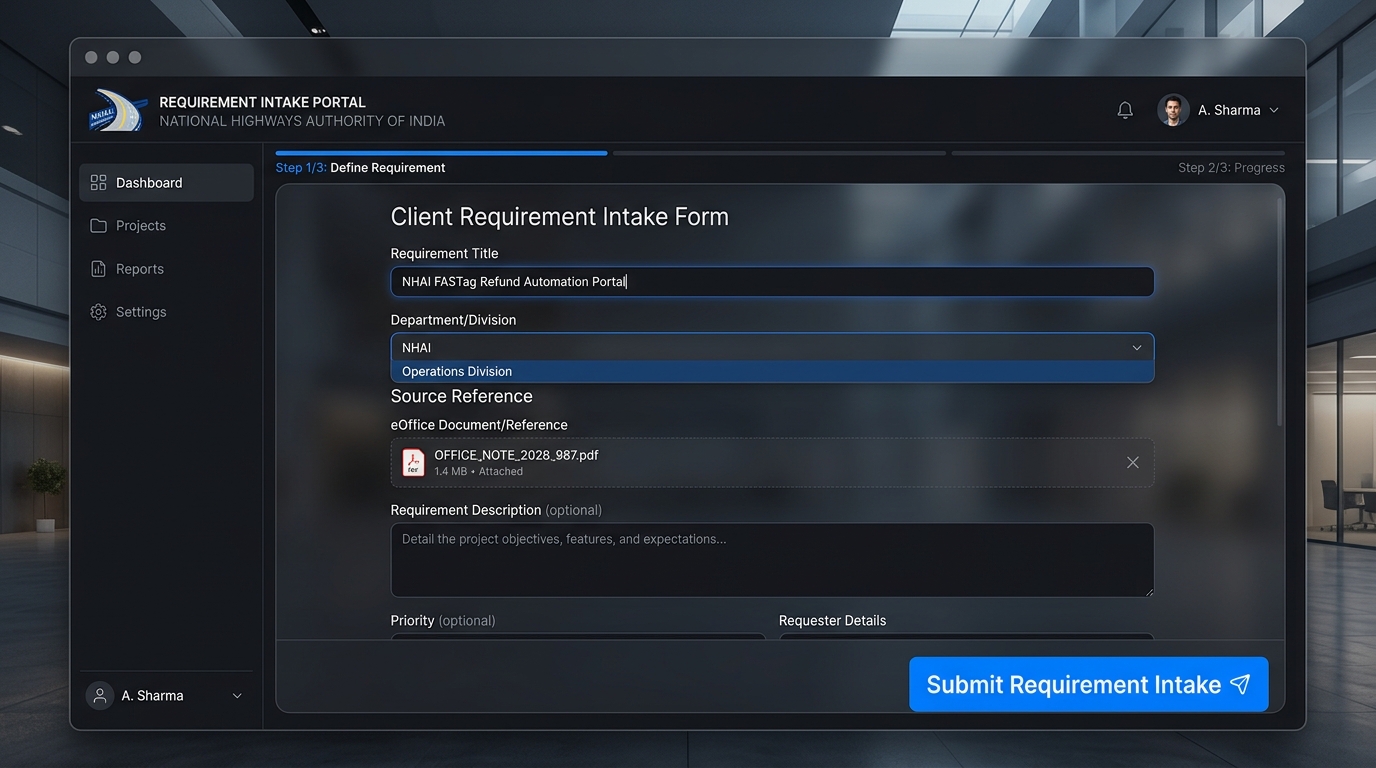
📸 UI SCREENSHOT: How to Submit a New Requirement Intake
- Click New Intake Request in the sidebar navigation or top command center.
- Enter a descriptive Requirement Title (e.g. Automated FASTag Refund Portal).
- Select Intake Type (Change Request, New Application, Report/Dashboard, Security Requirement).
- Select your Client Department, Project, Application, and Module from cascading dropdowns.
- Select Requirement Origin (Client Request, Audit Finding, Policy Mandate).
- Fill in Section B: Business Problem & Proposed Requirement details.
- Attach source reference documents (Letter, eOffice, Meeting Minutes) and click Submit Requirement Intake.
#intake#submit#new requirement#client#department#eoffice#letter#origin
Clarifications
2Answering Clarification Questions from Business Analyst
- If the BA requires more details, the intake status updates to CLARIFICATION_REQUIRED.
- Open the request link from your dashboard or top notification bell.
- Click the Clarifications tab on the request detail page.
- Read the question, type your departmental response, attach reference files, and click Submit Response.
- The item automatically moves back to IN_ANALYSIS for the BA.
#clarification#question#response#client#ba#details#notification
UAT Acceptance
3Executing Client UAT Sign-Off & Official Archiving
- When sprint execution is complete, open the Delivery Workspace (/change-requests/{id}/delivery).
- Click the ✅ UAT Sign-Off tab to review verified functional test cases.
- Click Submit UAT Sign-Off, select APPROVE or REJECT, enter remarks, and submit.
- Download or print the official sign-off sheet via 📜 Requirement Sign-Off report.
#uat#sign-off#approval#client#testing#acceptance#pdf#archiving